

How To Install Windows 1.0
Overview
Editions this applies to
-
Windows 1.01
-
Initial US release version
-
-
Windows i.02
-
International release
-
Support for international keyboards
-
Support for regional settings like time and date format
-
Support for A4 paper
-
-
Windows i.03
-
Additional drivers
-
Adds back up for Tandy graphics
-
-
Windows 1.04
-
Adds support for the IBM PS/2 (but no support for PS/2 mouse or VGA)
-
Windows 1.0x was the first versions of the Microsoft Windows line, bachelor every bit both Retail and OEM editions. A runtime edition was also included with some applications.
Limitations
Co-ordinate to Microsoft: Windows ane.0 required a minimum of 256 kilobyte, two double-sided disk drives and a graphics adapter. A hard disk and 512KB retentiveness are recommended for running multiple programs or when using DOS 3.0 or higher.
In actuality, it also needs at to the lowest degree DOS 2.0 (but lower than four.0), and the ii disk drives are not mandatory if there is a harddisk. It only supports upward to 640KB base memory (no support for European monetary system/XMS/UMB memory).
The retail release of Windows 1.04 adds back up for the IBM PS/two just did not add back up for the IBM PS/2 Mouse, or the newer VGA, MCGA or 8514/A video adapters. IBM distributed a special OEM version of Windows 1.04 equally function of the "IBM PS/two Collegiate Kit", which does have support for those features.
Unless this special IBM OEM version of Windows 1.04 is used, y'all must enable the serial mouse emulation in DOSBox-X and tell Windows during installation to configure a serial mouse. And too, you lot will exist limited to EGA graphics.
DOSBox-X config file
It is recommended that y'all create a custom DOSBox-X config file for running Windows one.0x
[sdl] autolock=true [dosbox] title=Windows ane.0x [dos] ver=3.four [serial] # Comment out the line beneath if you lot have the special OEM Windows 1.04 # release from the IBM PS/2 Collegiate Kit, which supports PS/two mouse. serial1=serialmouse [parallel] parallel1=printer [printer] multipage=true timeout=5000 [render] scaler=none [autoexec]
Re-create the above config and save it equally win1x.conf
Preparing for installation
The installation volition be into a mounted folder, and Windows one.0x will run from the integrated DOS that DOSBox-X provides. You can optionally install real DOS into DOSBox-Ten and install Windows i.0x in that, but there is no known advantage to doing then.
Offset by creating a directory on your system that you're going to use (mount) as your Windows 1.0x C: drive. Valid examples:
-
For Windows hosts
-
C:\winroot
-
C:\users\myuser\win1x
-
-
For Linux hosts
-
/home/myuser/winroot
-
/domicile/myuser/windows/win1x
-
| Notation | For users running Windows on their host figurer, do NOT mount the root of your C: bulldoze as the DOSBox-X C: drive! (e.g., Mount C: C:\ should NOT be done) |
All Windows 1.0x versions were shipped on diskettes, requiring anywhere betwixt 3 and 7 disks, depending on media-type and Windows version. And while information technology is possible to install Windows 1.0x from floppy images in DOSBox-Ten, the deejay-bandy procedure for this is rather irksome for substantial number of disks. Equally such it is recommended to make a directory such as "INSTALL" and copy the contents of ALL the diskettes into this directory. This way there is no demand to swap disks during the installation process.
At that place are several ways to extract the contents of disk images, such every bit 7zip on Windows or "Disk Image Mounter" on Linux. In this example, DOSBox-10 itself is used to mount a deejay image, re-create its contents into a folder, unmount the disk image and do the next.
MOUNT C /home/myuser/winroot C: MD INSTALL IMGMOUNT A DISK01.IMG -U XCOPY A:\. C:\INSTALL /Southward /Y IMGMOUNT A DISK02.IMG -U XCOPY A:\. C:\INSTALL /Southward /Y IMGMOUNT A DISK03.IMG -U XCOPY A:\. C:\INSTALL /S /Y IMGMOUNT A DISK04.IMG -U XCOPY A:\. C:\INSTALL /S /Y IMGMOUNT A DISK05.IMG -U XCOPY A:\. C:\INSTALL /S /Y IMGMOUNT A -U
Your new INSTALL directory at present holds the contents of all v floppy disks.
Installing in a mounted folder
You're now ready to outset DOSBox-X from the command-line, using the newly created win1x.conf config file. This assumes that the dosbox-x program is in your path and win1x.conf is in your electric current directory.
dosbox-x -conf win1x.conf
You lot at present need to mount your new folder as the C: drive in DOSBox-X, and the "INSTALL" directory on A: and start the installation.
Mount A /home/myuser/winroot/INSTALL MOUNT C /home/myuser/winroot A: SETUP
Arrange the path for mounting the A: and C: bulldoze as needed.
| Note | If your path has spaces, you need to enclose it in quotes. due east.g., MOUNT C "C:\Users\John Doe\winroot" |
The Windows installation will at present take place. Encounter the Windows 1.0x setup program department beneath.
Windows i.0x setup plan
The setup program will inquire several question relating to mouse, display and printer. If you take v1.02 or newer it will as well ask you nigh the keyboard layout.
Notation: Unless otherwise noted, the below screenshots are from the retail Windows one.01 release, other releases can vary. In detail, OEM or Runtime versions may have a different number of disks and present other options.
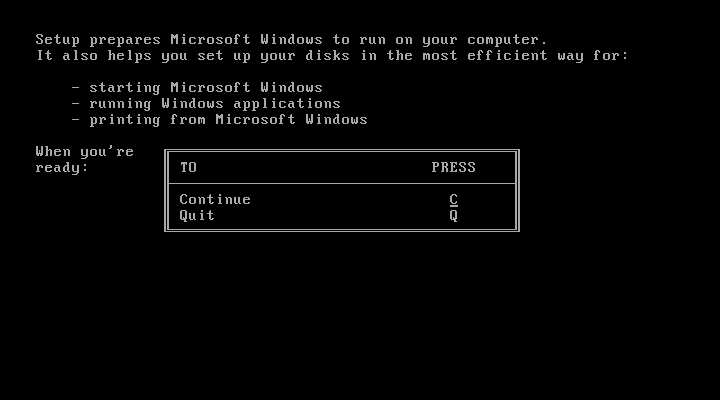
Simply press Enter, or "C" to go along as prompted.
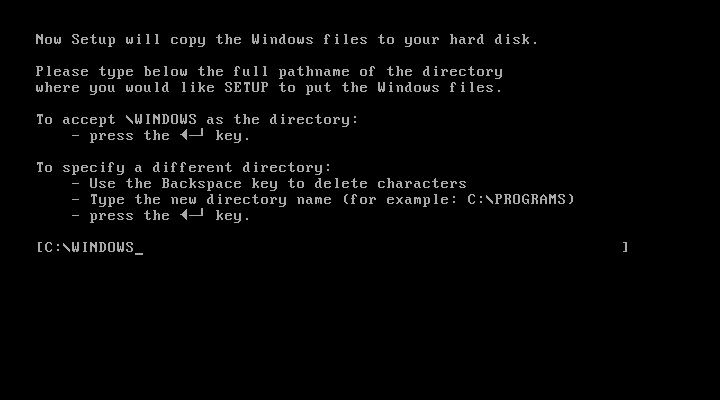
Installation directory
You can optionally specify a unlike directory to install Windows into.
Only press Enter to go on as prompted.
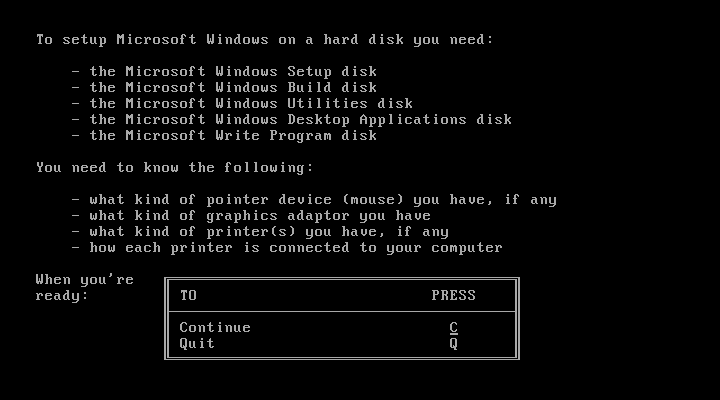
This screen will vary depending on the release version, OEM and if it is a runtime version.
Simply press Enter, or "C" to go along equally prompted.
Keyboard selection
If you have version 1.02 or after, SETUP will ask for your keyboard layout.

Mouse option
If you lot accept the special IBM OEM version of Windows 1.04, as shown below, you can select option viii "IBM Personal Arrangement/ii Mouse" for PS/two mouse. In which example you lot need to disable the serialmouse choice in your DOSBox-X config file.
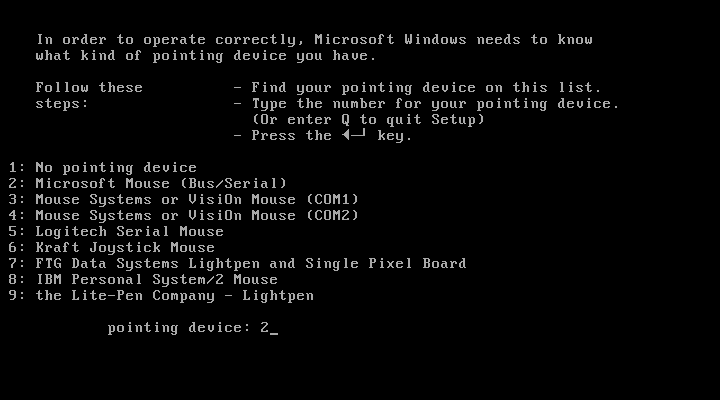
Otherwise, select selection ii "Microsoft Mouse (Bus/Serial)" and press Enter to go on as prompted.

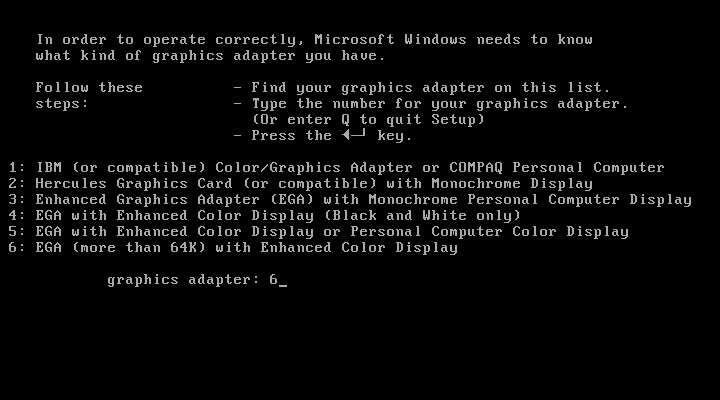
Graphics Adapter selection
If you lot have the special IBM OEM version of Windows 1.04, as show beneath, you can select pick 2 "IBM Personal Organization/2 Model 50, 60, 80" for VGA.
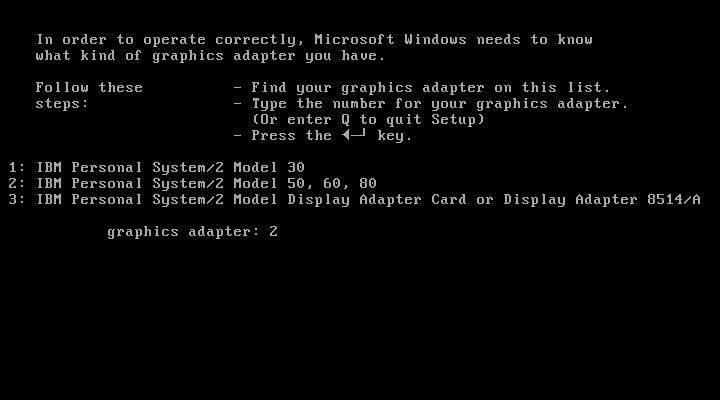
Otherwise, select option 6 "EGA (more than 64K) with Enhanced Color Display" every bit shown beneath, and printing Enter to continue as prompted.
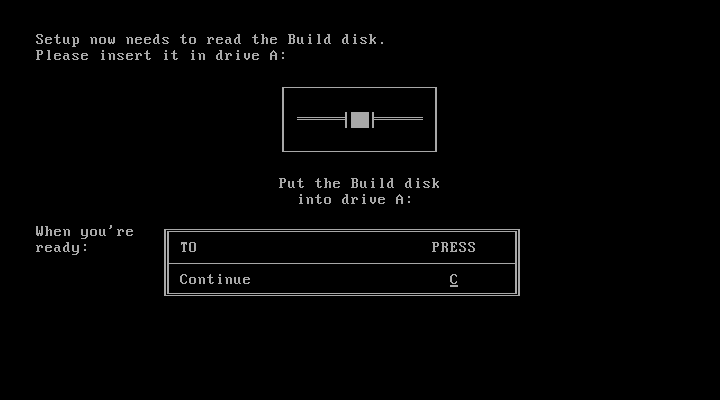
Build disk
SETUP now asks for the Build disk.
-
If you lot're following the binder installation method, you lot can only press Enter.
-
If you're using deejay images to install Windows, you demand to now swap the disk using the carte item "DOS" followed by "Swap floppy". And then press enter.
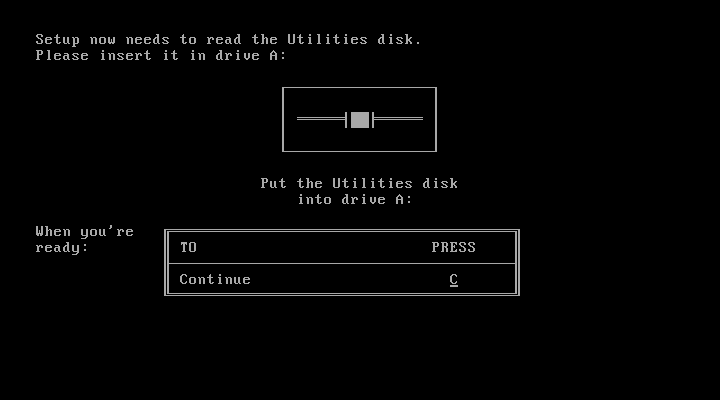
Utilities disk
SETUP now asks for the Utilities deejay.
-
If y'all're post-obit the folder installation method, y'all can merely press Enter.
-
If yous're using disk images to install Windows, you lot need to at present bandy the disk using the bill of fare item "DOS" followed by "Swap floppy". And then press enter.
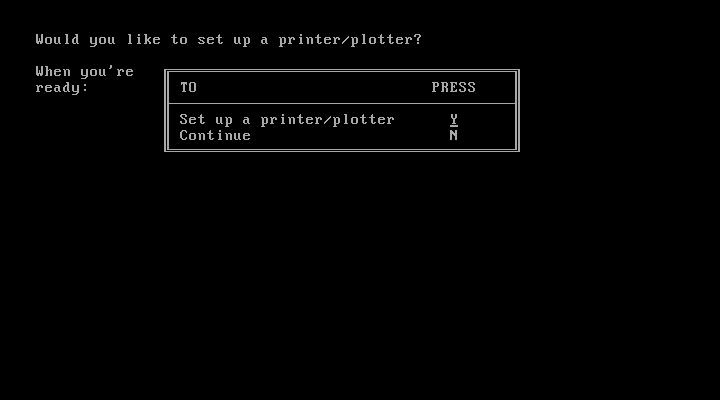
Printer setup
SETUP at present asks if you desire to set up a printer. You lot tin can press enter or "Y" to confirm, or y'all can press "Northward" to skip this step.
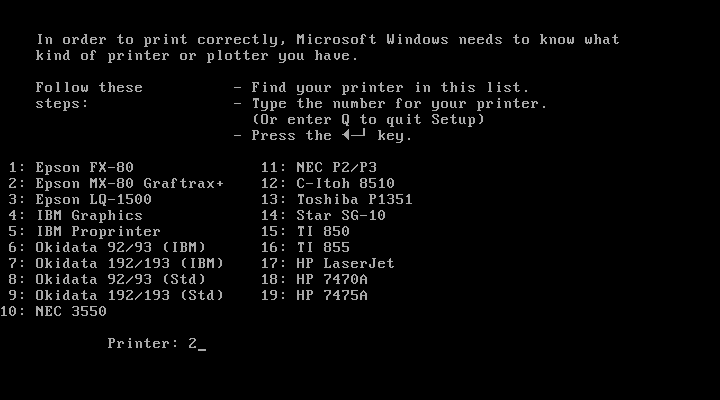
Printer setup - select model
If you lot indicated wanting to set upward a printer, SETUP now asks you which model.
For this guide we use pick ii, the "Epson LQ-1500", and press Enter.
Subsequently releases may have more options, such as a "Generic / Text But" printer which can also be used.
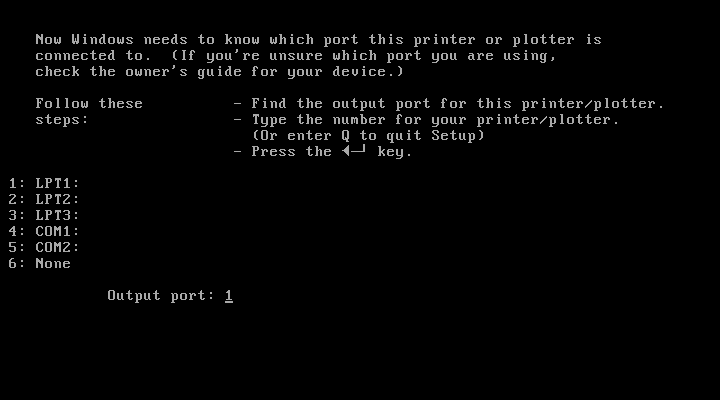
Printer setup - port select
If y'all indicated wanting to ready a printer, SETUP now asks you which port the printer is connected to.
Select the number for the "LPT1:" port and press Enter.
| Notation | In the version shown, information technology is option 1, but in another releases it is option 2. |
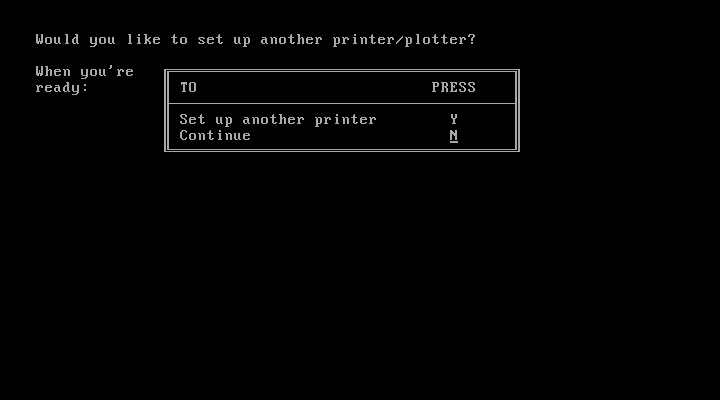
Printer setup - another printer
SETUP now asks if y'all want to set upwardly some other printer.
Printing Enter to continue without setting up some other printer.
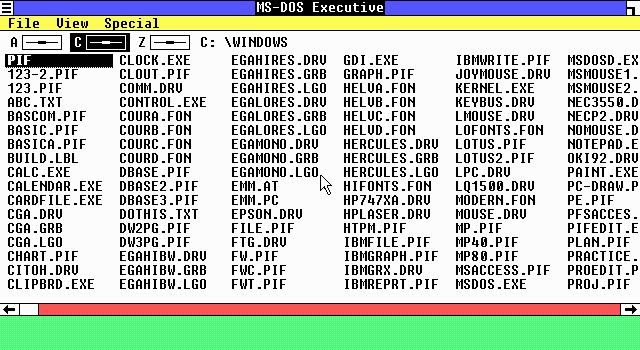
Yous can ever change the installed printers afterwards by running Control.EXE from within Windows i.0x.
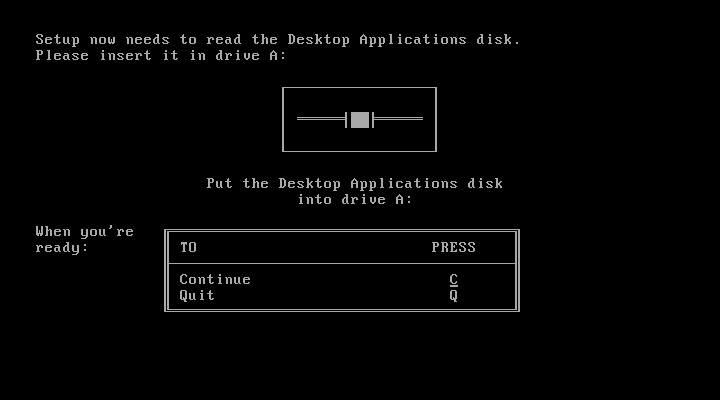
Desktop Applications disk
SETUP now asks for the Desktop Applications disk.
-
If you lot're following the folder installation method, y'all tin but printing Enter.
-
If yous're using deejay images to install Windows, y'all need to now swap the disk using the card detail "DOS" followed by "Swap floppy". And then press enter.
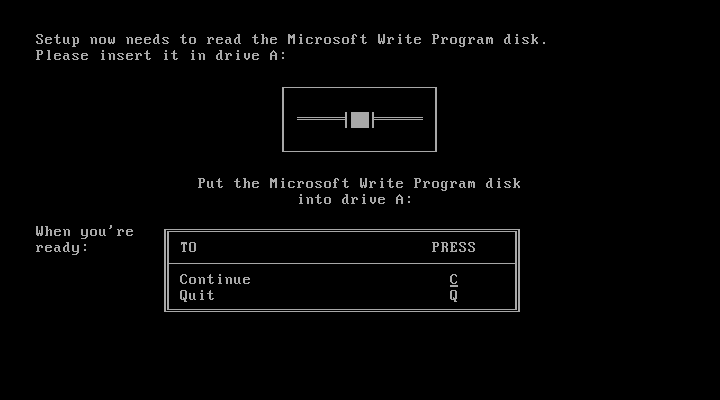
Microsoft Write Program deejay
SETUP now asks for the Microsoft Write Program disk.
-
If you're following the binder installation method, you can simply press Enter.
-
If you're using deejay images to install Windows, you demand to now swap the deejay using the menu detail "DOS" followed by "Swap floppy". And then printing enter.
SETUP completed
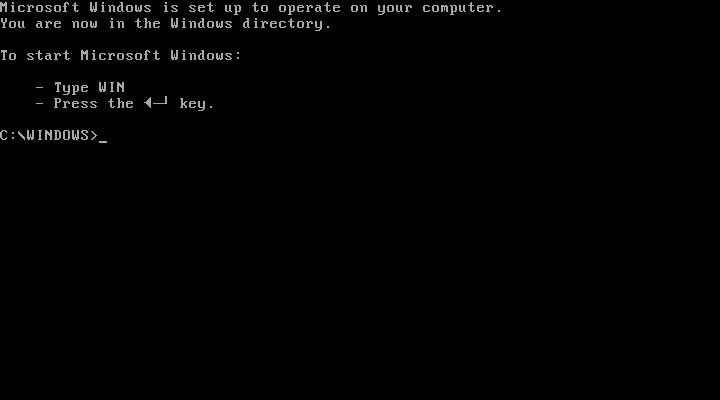
The setup program is now finished, and you're fix to start Windows 1.0x.
But first blazon EXIT to close DOSBox-Ten.
And then edit your win1x.conf config file and add the following lines into the [autoexec] section at the stop of the file:
@Echo OFF Mount C /habitation/myuser/winroot C: Set PATH=%PATH%;C:\WINDOWS; C:\WINDOWS\WIN.COM Leave
Adjust the path for mounting the C: drive equally needed. If you lot don't want DOSBox-10 to close when exiting Windows 1.0x, remove the Get out control.
Starting Windows 1.0x after installation
Later on the installation is finished, you lot can start Windows one.0x from the control-prompt with the post-obit command:
dosbox-ten -conf win1x.conf
You can optionally create a shortcut on your desktop to offset Windows one.0x directly.
Source: https://dosbox-x.com/wiki/Guide%3AInstalling-Windows-1.0x
Posted by: carterseethe.blogspot.com
0 Response to "How To Install Windows 1.0"
Post a Comment